
Weathering the Storm: Using Sandbags for Natural Disaster Preparedness
Hey there, fellow preppers! When it comes to staying safe during natural disasters, being prepared is the name of the game. Mother Nature can be unpredictable, and that’s why we’re diving into an essential topic today – sandbags! These trusty bags are like the unsung heroes of emergency preparedness, and we’re here to show you why.
Picture this: a heavy storm strikes, and floodwaters threaten your home. You need a quick and effective solution to protect your property and loved ones. That’s where sandbags come in – they’re like superheroes that can create barriers and prevent water damage, helping you weather the storm like a pro.
In this Southern Prepper Magazine post, we’ll walk you through the ins and outs of using sandbags for natural disaster preparedness. We’ll explore their versatility and discuss how to deploy them in different situations. So, let’s get started and equip you with the knowledge you need to be a sandbag-wielding champion in times of crisis.
Table of Contents
Understanding the Role of Sandbags
Sandbags may seem like simple sacks filled with sand, but don’t underestimate their power in disaster preparedness! These unassuming bags play a crucial role in protecting homes, properties, and communities during natural disasters. Let’s dive into why they’re a must-have tool in your preparedness arsenal.
1. Versatility in Emergency Situations
One of the key reasons sandbags are so popular in disaster preparedness is their versatility. Whether it’s heavy rain causing floods, hurricanes bringing storm surges, or even mudslides threatening your area, sandbags can come to the rescue. Their ability to create barriers and redirect water flow makes them a valuable asset in a wide range of emergency scenarios.
2. Reliable and Effective Barriers
When properly deployed, sandbags act as robust barriers against flooding and water infiltration. Their weight and density combined with the flexibility of sand allow them to form a tight seal, preventing water from seeping through and causing damage. This property makes them particularly useful in low-lying areas and near water bodies during heavy rainfall or river overflow situations.
3. Easy and Quick Deployment
In times of crisis, speed matters. The beauty of sandbags lies in their simplicity – they are easy to fill, transport, and arrange. When disaster strikes, you need quick solutions, and sandbags can be rapidly deployed to protect your property and loved ones. No need for complicated machinery or advanced technical skills – just good old-fashioned sandbag power!
4. Cost-Effectiveness
When you’re preparing for emergencies, budget-friendly solutions are essential. Sandbags fit the bill perfectly! Compared to some high-tech alternatives, sandbags are relatively inexpensive and readily available. You can either purchase pre-filled sandbags or make your own with sand and sturdy bags. Their cost-effectiveness makes them an accessible option for every prepper.
5. Eco-Friendly Option
Thinking about the environment while preparing for disasters? Sandbags have got you covered! They are eco-friendly and biodegradable, making them a sustainable choice. After use, the sand can be emptied and the bags can be safely disposed of or reused for other purposes. This ensures you’re protecting not only your property but also the environment.
6. Part of a Comprehensive Preparedness Plan
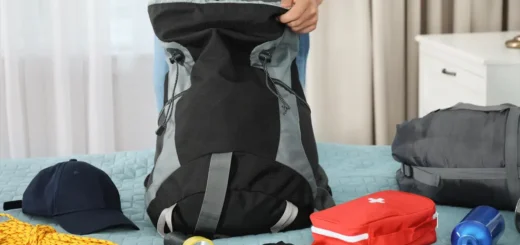
While sandbags are a fantastic tool, they work best as part of a comprehensive preparedness plan. They complement other safety measures such as evacuation plans, emergency kits, and communication devices. Integrating sandbags into your overall strategy enhances your ability to withstand and recover from natural disasters effectively.
Types of Natural Disasters and Sandbag Applications
Sandbags are like superheroes in the world of disaster preparedness, coming to the rescue in various natural disaster scenarios. Let’s explore some common natural disasters where sandbags can be your ultimate line of defense and how they are used in each specific situation.
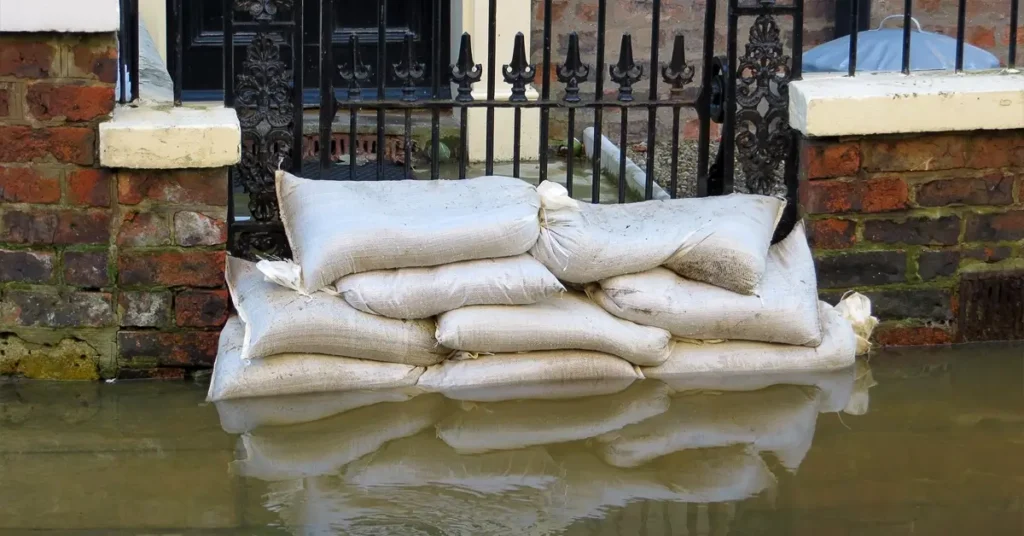
Floods – When heavy rains pour and rivers overflow, flooding can wreak havoc on communities. Sandbags are a frontline defense in flood-prone areas. They can be stacked to create barriers around homes and buildings, diverting the flow of water away from vulnerable areas. Placing sandbags at entry points like doorways and garages prevents water from seeping inside, keeping your property dry and safe.
Hurricanes and Storm Surges – Hurricanes and tropical storms can bring powerful storm surges, causing devastating coastal flooding. Sandbags prove invaluable in these situations, forming protective walls along shorelines and beachfront properties. They absorb the impact of surging waters, reducing erosion and potential structural damage. Additionally, sandbags can reinforce existing barriers like seawalls, enhancing their effectiveness against the force of the ocean.
Heavy Rainfall and Mudslides – Regions experiencing heavy rainfall, especially in hilly or mountainous areas, are prone to mudslides. The use of sandbags can stabilize loose soil and prevent mudslides from reaching properties. By stacking sandbags along slopes and hillsides, they act as anchors, holding the ground in place and reducing the risk of dangerous landslides.
Stormwater Management – Beyond floods, sandbags play a vital role in managing stormwater runoff. During intense rainfall, storm drains can quickly become overwhelmed, leading to urban flooding. Sandbags strategically placed around storm drains help to slow down and redirect water flow, giving drainage systems a chance to cope with the excess water.
Emergency Levee Construction – In cases where natural or artificial levees are at risk of breaching, sandbags can be quickly deployed to reinforce weak spots. Their ability to conform to irregular surfaces and form tight seals is crucial in shoring up levees and preventing catastrophic breaches.
In all these scenarios, the strategic placement of sandbags can mean the difference between minimal damage and disaster. It’s essential to have a well-thought-out plan and adequate supplies of sandbags ready to deploy when needed.
Proper sandbag placement and teamwork are crucial for maximizing their effectiveness. Now that we’ve covered the types of natural disasters where sandbags shine, let’s move on to the nitty-gritty of choosing the right sandbags for your needs.
Choosing the Right Sandbags
When it comes to preparing for natural disasters, having the right sandbags can make all the difference in protecting your property and loved ones. Let’s dive into the various types of sandbags available in the market and explore how to select the best ones for your specific needs.
1. Size Matters
Sandbags come in different sizes, ranging from small to large. Smaller sandbags are ideal for quick and localized protection, while larger ones are better suited for constructing barriers over more extensive areas. Consider the dimensions of the areas you want to protect and choose sandbags that fit snugly and securely in those spaces.
2. Material and Durability
Sandbags are typically made from either burlap or polypropylene. Burlap sandbags are biodegradable and eco-friendly, but they are best suited for short-term use and may not hold up well in wet conditions. On the other hand, polypropylene sandbags are more durable and water-resistant, making them suitable for prolonged use and exposure to the elements.

3. Weight Options
Sandbags are available in various weight options, typically ranging from 30 to 50 pounds when filled with sand. The weight you choose depends on the intended purpose and the severity of the anticipated disaster. Lighter sandbags are easier to handle and transport but may not offer as much stability as heavier ones. Assess the potential threat level and select the appropriate weight accordingly.
4. UV Protection
If you live in an area with plenty of sunlight exposure, consider UV-resistant sandbags. These are specially treated to withstand the harmful effects of ultraviolet rays, ensuring they last longer even when exposed to the sun for extended periods.
5. Ready-to-Fill vs. Pre-Filled
Some sandbags come pre-filled with sand, saving you time and effort in emergency situations. However, these pre-filled bags can be heavy and challenging to move around. Ready-to-fill sandbags, which come empty and require filling on-site, are more portable and easier to store until needed. Keep your specific situation in mind when choosing between pre-filled and ready-to-fill options.
6. Quantity
The number of sandbags you need will depend on the size of the area you want to protect and the level of protection required. Assess the potential flood zones and vulnerable spots around your property to determine the quantity of sandbags needed.
7. Reinforcements
Consider investing in additional tools like sandbag ties or sandbagging machines to ensure a secure and efficient sandbag deployment. Sandbag ties help seal bags tightly, preventing sand from leaking out and ensuring a solid barrier.
By carefully considering these factors, you can select the most appropriate sandbags to fortify your property against a range of natural disasters. Check the condition of your sandbags regularly and replace any damaged or worn-out ones to maintain their effectiveness over time.
Next, we’ll move on to the critical steps of sandbag placement and proper deployment techniques for maximum protection during emergencies.
Proper Sandbag Deployment Techniques
Alright, time to get our hands dirty and learn the art of deploying sandbags like a pro! These step-by-step instructions will guide you on how to fill and place sandbags effectively, ensuring you create a sturdy barrier that offers optimal protection during disasters.
Step 1: Gather Your Gear
Before you get started, make sure you’ve got all your supplies ready to roll. You’ll need sandbags (pre-filled or empty), sand, a trusty shovel, and a good pair of gloves to keep your hands safe and sound.
Step 2: The Art of Filling
If you’ve got empty sandbags, it’s time to give them a purpose. Fill each bag about two-thirds full with sand, leaving enough room at the top to fold and tie the opening securely. Dry sand is your best bet since it’s easier to handle and packs better when stacked.
Step 3: Tying It Up
Here’s where you show off your knot-tying skills. Fold the open end of the sandbag inward to create a flap. This nifty little trick will give your barrier extra stability and a tighter seal. Now, tie that flap securely using the attached strings or go for zip ties – your choice!
Step 4: Set the Foundation
Start by laying the first layer of sandbags flat on the ground where you want your barrier to rise. Make sure the surface is squeaky clean, free of debris, and definitely no sharp stuff that could poke holes in your sandbags.
Step 5: The Staggering Game
Time to put that Tetris expertise to good use! For a rock-solid barrier, stagger each layer of sandbags. Offset each bag so that the seam is neatly covered by the one above it. This brilliant interlocking pattern boosts stability and gives water zero chance of sneaking through any gaps.
Step 6: Press and Shape
As you stack those sandbags, give them a little love. Use your hands or your trusty shovel to press the sand inside each bag firmly. This helps the sandbags settle nicely and take the shape of a well-built fortress.
Step 7: Up the Ante
Need a taller barrier or slopes to steer water away? No worries! Just keep following the same stacking and staggering technique. Slowly build up those layers, making sure each one is compacted and shaped just right.
Step 8: Play Inspector Gadget
Once you’ve built your masterpiece, it’s time to play the inspector. Check for any potential weak spots or pesky leaks. Reinforce those areas with extra sandbags or make adjustments as needed to keep your defense rock-solid.
There you have it, the insider’s guide to mastering sandbag deployment! With these tried-and-true techniques, you’ll be ready to protect your turf and loved ones like a seasoned pro. So, roll up those sleeves, grab those sandbags, and let’s build some serious protection against Mother Nature’s fury!
Maintaining Your Sandbags: Tips for Long-Term Readiness and Safety
Now that you’ve mastered the art of sandbag deployment, let’s talk about the key to keeping them in tip-top shape and ensuring their effectiveness over time. How do you know when to reuse or when to dispose of your sandbags? Regular maintenance is the name of the game, and safety should always be on your mind when handling and disposing of these lifesaving tools. Let’s dive into some essential maintenance and safety tips to keep you and your sandbags at the top of your prepping game.
Maintenance Tips
1. Check and Rotate: Just like your emergency supplies, sandbags need a little TLC too. Every few months, give your sandbags a quick inspection. Look for any signs of wear, tear, or potential damage. If you spot any issues, replace those bags right away. And don’t forget to rotate your sandbags – the last thing you want is a bag full of clumpy, unusable sand when disaster strikes.
2. Keep It Dry: Moisture is not a sandbag’s best friend. Make sure to store them in a dry place, away from rain or water sources. If your sandbags do get wet during deployment, let them dry out thoroughly before stacking them away again. Dry sandbags are more effective and less prone to mold or decay.
3. Store with Care: Stack those sandbags like you’re building a pyramid of protection! Create a sturdy, well-organized pile, so they don’t lose their shape or effectiveness. And don’t forget to cover them up with a tarp or plastic sheet to shield them from the elements.
Safety Tips
1. Lift with Caution: Sandbags may seem harmless, but when you start stacking them, they can pack some weight. Lift with your knees and use proper lifting techniques to avoid any back strain. If you need some extra muscle power, don’t hesitate to ask for help – teamwork makes the dream work!
2. Avoid Contamination: If you’re using sandbags to control flooding, be mindful of the water they come into contact with. Floodwater can carry all sorts of nasty stuff, so avoid contact with your skin and wash your hands thoroughly after handling it.
3. Disposal Do’s and Don’ts: Once the storm has passed, it’s time to say goodbye to those trusty sandbags. But wait, don’t just toss them anywhere! If they’ve been in contact with floodwater or hazardous materials, treat them as potentially contaminated and follow your local guidelines for proper disposal.
By giving your sandbags some love and following safety protocols, you’ll ensure they’re ready to tackle any emergency that comes your way. With maintenance and safety on your side, you and your sandbags will be an unstoppable force against the forces of nature.
Conclusion of Using Sandbags for Natural Disaster Preparedness
Congratulations! You’ve now unlocked the secrets of sandbags and how they can be your ultimate allies in times of natural disasters. Sandbags are an essential tool to have in your emergency preparedness arsenal.
We’ve learned how sandbags can provide a sturdy defense against flooding, hurricanes, heavy rainfall, and other calamities. They are versatile, easy to use, and can make a significant difference in protecting your property and your family during a crisis.
But it doesn’t end there. Regular maintenance is key to ensuring the effectiveness of your sandbags over time. Check for wear and tear, replace damaged ones, and keep them dry and ready for action. Additionally, always handle sandbags with care, as they can be heavy and require proper lifting techniques to avoid injuries.
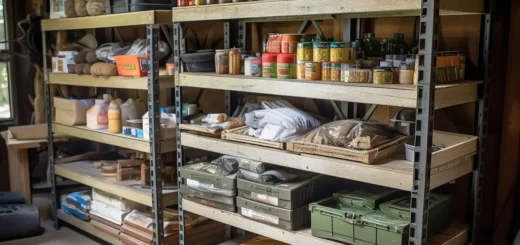
Now that you know the ins and outs of sandbag usage, it’s time to take action. Include sandbags as a crucial part of your emergency preparedness plan. Store them in an easily accessible location, so they’re ready to be deployed at a moment’s notice.
Remember, disasters can strike when least expected, but with the right tools and preparation, you can weather the storm like a pro. So, stay informed, stay vigilant, and keep those sandbags at the ready. Stay safe and stay prepared!